
Draw relationship lines
This article is for anyone editing a Relationship Map. When you finish, the map shows the connections that do not appear on an org chart: who mentors whom, who quietly influences the budget holder, who came from the same former employer.
You do not need Crush or an Account Plan. Custom lines work on a standalone Relationship Map. If the canvas is empty, start with Create your first Relationship Map.
Two kinds of line
| Line | What it means | How it is made |
|---|---|---|
| Reporting (hierarchy) | This person reports to that person | Drag a card onto the person they report to |
| Custom relationship | Anything else: mentors, influences, former colleague | Draw it from the card menu |
This article covers the second kind. The line types available to you — their names and colors — are defined by your admin, so what you see may differ from the examples here.
Before you start
- You can edit the map (PROLIFIQ RELATIONSHIP MAP Standard User, not Read Only).
- At least one line type is available to this map. If none are, there is no draw option in the menu.
Draw a line
- Open the map.
- Right-click the card the relationship starts from.
- Choose the line:
- If your org has one line type, the menu shows a single entry, Draw a new type line.
- If your org has several, hover Draw a new relationship and pick the type from the sub-menu.
- A line attaches to your cursor. Click the card at the other end.
The line saves as soon as you connect it, and it carries the default label for that type. Click the person the line should point to; the arrow appears on that end.
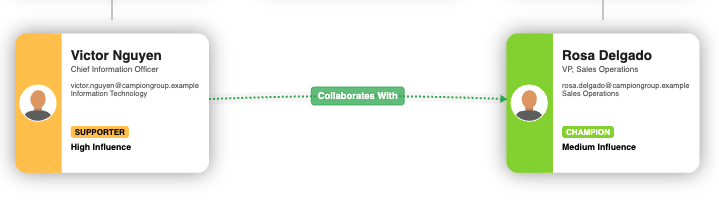
You can draw between any two person cards, including placeholders, users, and leads. You can draw more than one line between the same two cards when you need more than one relationship type.
Rename a line
- Right-click the line.
- Select Edit relationship label.
- Type the new label and press Enter, or click anywhere outside the box.
You can also double-click the label itself to open the box.
Not every type allows this. If Edit relationship label is missing, your admin has locked the wording for that type so it stays consistent across maps. That is a setting, not a bug.
Reconnect or remove a line
- Reconnect: press and hold the arrow end of the line, then drop it on a different card.
- Remove: right-click the line and select Remove. This deletes the relationship line, not the people.
Whether a removed line disappears everywhere or only here depends on how your admin set the line scope — see Set up line types below.
Turn the lines down instead of deleting them
A map with thirty lines is unreadable in a meeting. Rather than delete work, fade the lines.
- Open the map settings.
- Scroll to the bottom.
- Set Relationship Line Opacity to a value between 0 and 100. Zero hides the lines; 100 makes them solid.
- Save.
Faded lines come back into view when you select a card, so you can keep the detail and still present a clean map. Reports To Line Opacity does the same for the reporting hierarchy.
The value must be between 0 and 100. Anything outside that range is rejected when you save.
When lines do not behave
| What you see | Usual cause |
|---|---|
| No draw option in the card menu | You have read-only access, or no line type is available to this map |
| Edit relationship label is missing | The line type does not allow users to change the label |
| Lines are invisible | Relationship Line Opacity is at or near 0 — select a card to confirm |
| A line you drew is not on another map | Lines stay on the map they were drawn on unless Use Global Relationship Lines is on |
| You cannot remove a line between two cards | Check that it is a custom line, not the reporting hierarchy — remove that one by right-clicking it and selecting Remove as well |
| The line drew to the wrong person | Drag the arrow end onto the right card instead of deleting and redrawing |
Set up line types (admins)
Line types are records on the Relationship Types tab.
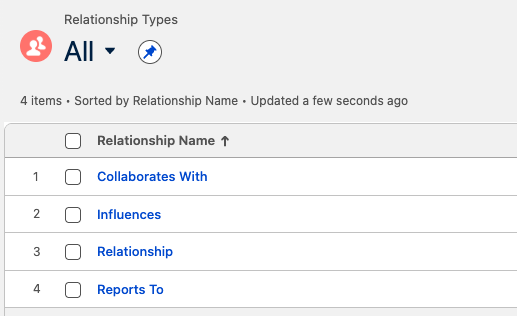
- Open the Relationship Types tab and switch the list view to All.
- Press New.
- Fill in the fields. Relationship Name and Line Color are required.
- Save.
| Field | What it does |
|---|---|
| Relationship Name | Name of the type, for example Mentors or Influences |
| Default Label | The text that appears on a new line of this type |
| Line Color | Hex value, for example #0080ff |
| Label Editable | Lets users change the label on lines they draw |
| IsActive | Unchecked types disappear from the draw menu |
| Used in all Relationship Maps | Makes the type available on every standalone Relationship Map |
| Used in all Account Plans | Makes the type available on maps inside Account Plans |
To limit a type to specific maps, leave Used in all Relationship Maps unchecked and link the type to a map from its Related tab.
Two decisions are worth making before anyone draws:
- Keep the list short. Three or four types your team can name from memory beat a dozen nobody uses consistently.
- Choose the scope. Use Global Relationship Lines on a map — Relationship Line Global Scope as the org default in Relationship Map Settings — decides whether a drawn line follows the people to other maps or stays on the map it was drawn on. Set it before teams start drawing, because switching it later changes which lines a map shows.