
Create your first Relationship Map
This article is for anyone who can create a Relationship Map. When you finish, you have a map with people on it and at least one reporting line.
You do not need Crush or an Account Plan. If you only bought Relationship Map, start from an Account or an Opportunity. If you also have Crush, you can still start there — or open Relationship Maps from an Account Plan.
Before you start
- You have PROLIFIQ RELATIONSHIP MAP Standard User (Read Only cannot create). If you cannot see the app or the map, see I can’t see Crush or an Account Plan.
- You can open an Account or Opportunity that has contacts worth mapping. Use a placeholder when the person is not in Salesforce yet.
Open or create a map
Without an Account Plan (Relationship Map-only or Crush)
- Open the Account or Opportunity.
- Find Relationship Maps (related list or Lightning component on the page).
- Open an existing map, or create one.
From Crush
- Open the PROLIFIQ CRUSH app from the App Launcher.
- Open Relationship Maps, or open an Account Plan and go to its Relationship Maps.
- Create a map. Use a second map when you need a separate workstream on the same plan.
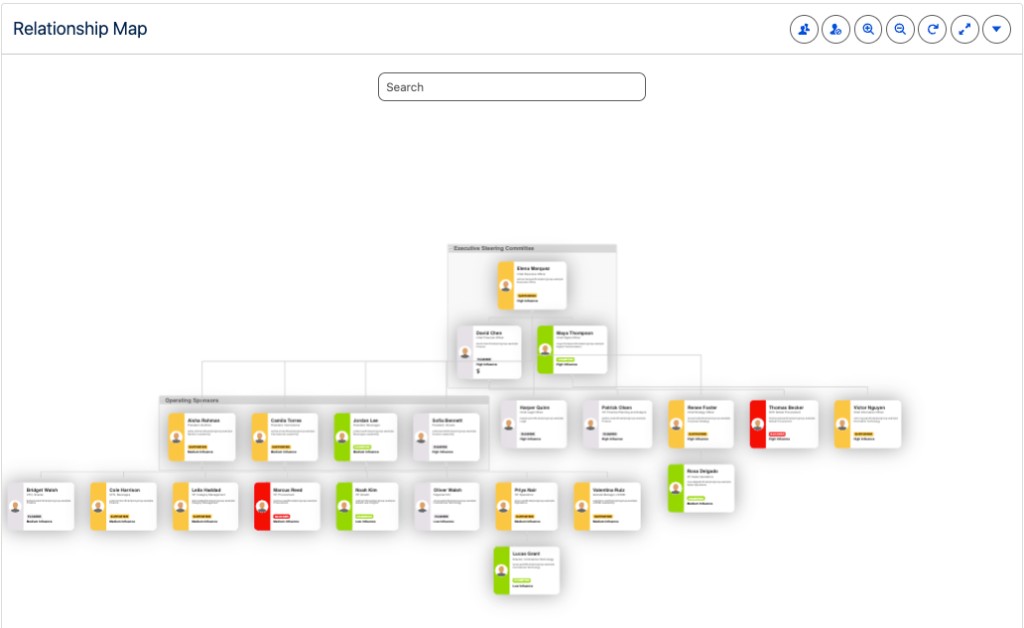
Add people
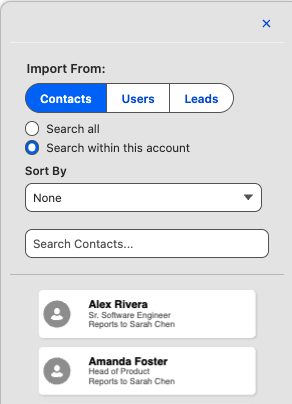
On the map, search and add:
| Add | When to use it |
|---|---|
| Contact | Someone already in Salesforce. Search Search Contacts…, then Add this contact. |
| User | An internal teammate. Search Search Users…. |
| Lead | When the Lead Tab is on in Relationship Map settings. Search Search Leads…. |
| Placeholder | A role you know exists but is not a record yet. Create New Placeholder. |
You can also Create New Contact from the map if that setting is on.
Add the economic buyer, a champion, and one person you have not met. A single card is not a buying committee.
Draw reporting lines
- Connect a person to the person they report to (drag a reports-to line between cards).
- If Auto-layout is on, let the map settle. Turn it off when you need a specific shape for a meeting.
- Use fullscreen if the committee does not fit.
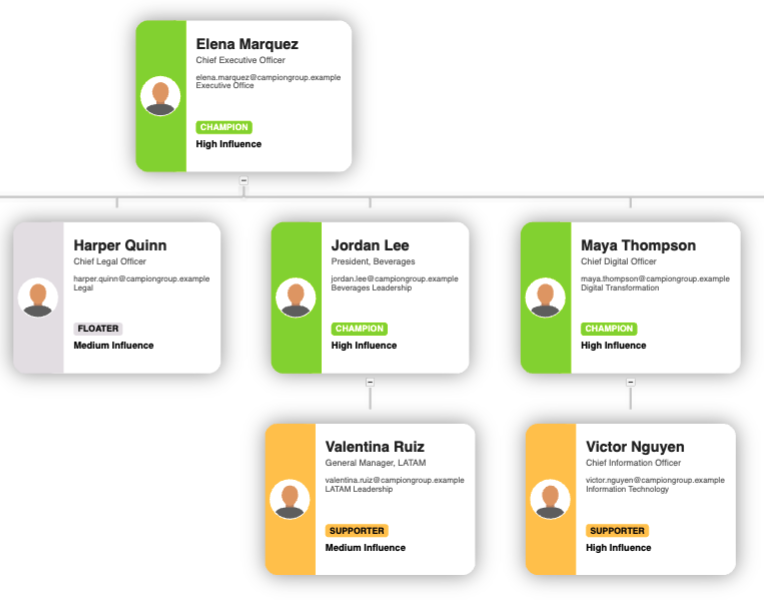
Set Influence and Support next — that is what makes the map useful: Add people and set influence and support.
Optional: generate with AI
If your admin has finished Configure AI map generation, you can generate a first structure instead of adding every person by hand.
- Open the Account (or the map entry your admin documented).
- Run generate.
- Review every person. A generated map is a start, not a finished committee.
If generate fails, build the first map by hand and send the admin to the AI setup article. You are not blocked.
What “done” looks like
- The map opens from an Account or Opportunity without a Crush plan.
- Several people (or placeholders) are on the canvas.
- At least one reporting line is visible.
- You know the next step is influence and support, not badges or Omni Viewer.